Agencies-Gaza post
Reinstall updates on Windows 11 with simpl steps

Even while updates for Windows 11 might occasionally result in unintended issues that can significantly affect performance, the fault isn’t always with the upgrade. Instead, it can be that the system update wasn’t implemented properly, leading to glitches and other issues.
If this is the case, the cumulative update can be removed and reinstalled to resolve the issue. You can uninstall and disable the update to stop the system from downloading it once more if the computer is still not functioning as it should.
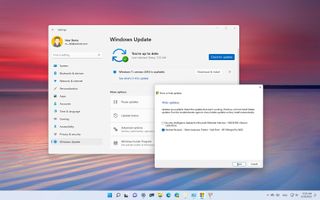
You can follow the instructions in this manual to uninstall and then reinstall a Windows 11 cumulative update. We also demonstrate how to stop the system from attempting to download the problematic update if the issue persists.
- Open Settings.
- Click on Windows Update.
- Click the Update history setting.
- Under the “Related settings” section, click the Uninstall updates setting.

- Select the updates to remove.
- Click the Uninstall button.

- Click the Yes button.
- Click the Restart now button (if applicable).
After you complete the steps, the update will download and install on your device.
If the update doesn’t appear to be available anymore, you may be able to download the update directly from the Microsoft Update Catalog website(opens in a new tab) using the knowledge base (KB) number. Once you download the update, you can double-click to launch the installer.
HOW TO BLOCK SPECIFIC UPDATES ON WINDOWS 11
If the computer continues to have problems after reinstalling the update, it could be a bug with that specific patch. In this case, you can remove the update one more time and use the “Show or hide updates troubleshooter” to block it to prevent the system from re-downloading it.
To block a system update on Windows 11, use these steps:
- Download Show or hide updates troubleshooters from Microsoft(opens in new tab).
- Quick note: The browse may detect the file as malicious, but it’s not. However, you should use this tool at your own risk.
- Double-click the .diagcab file to start the tool.
- Click the Next button.
- Click the Hide updates option.

- Select the problematic update.
- Click the Next button.

- Click the Close button.
Once you complete the steps, Windows 11 will no longer try downloading and installing the same update. However, when a newer update becomes available, Windows Update will get it automatically.
If you change your mind and want to allow the update again, you can use the same instructions, but in step 4, select the “Show hidden updates” option. After you have done this, check for updates again.
Source: HERE


